Paper Bow
If you are using double side pattern paper place the side that you want down.
Mountain fold horizontally, crease well,then unfold.
Mountain fold the Other way, crease well and unfold.
You should have this.
Valley fold diagonally crease well,and fold.
Valley fold the Other way, crease well and unfold. you should have this 2 mountain fold lines that looked like a plus sign.and 2 valley folds that looked like "X".
Follow the creased lines and fold your paper like this.
Press it down and fold the "closed" side about 1/2" down like the picture below crease well.
Open your paper completly like shown. As you can see here is a small Square in the center and the creased line are not the same.
You are going to mountain fold those line or small square.
Like This.
Refold the paper like the 7th picture above expect.
You will push the small square down like this.
Your paper now should look like this with two layers.
Fold the top corners down like this.
(turn the paper over and repeat.)
You are going to open the paper, making sure your folds(small Square) stay in place.
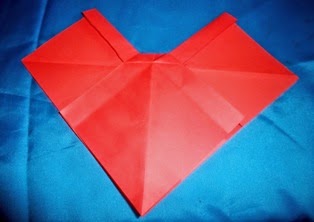
It should look this after you opened the paper.
Turn the paper over, make sure you place your paper like in the photo. Cut at the fold(where the black lines are)
After the cut you should be able to move the two pieces up and down. these 2 pieces will be the bow tails.
Fold to top piece down and fold the edges.
Of the side pieces down like shown.
Fold the Other edges up and over lab the previous fold a bit.
Now working on the bow tails,fold the edges in then cut both pieces at the center where the black line is ( make sure don't cut the small Square on the bottom)
Then fold it like shown.
Turn it over.
fold the bow tip under the center Square.
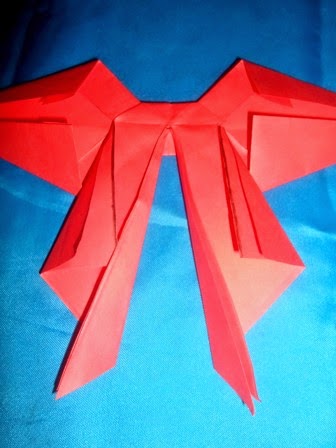
Cut the bow tails and you are done! It wasn't to hard Right!!! ;)
I was in a rush putting this tutorial to gethe so some phrase might not be clear but it was hopping the Picture will help you. :)